

.svg.png)


Comment connecter Tanganica Pixel à Shopify ?
Remarque : Avant d'installer le Tanganica Pixel dans votre boutique Shopify, assurez-vous que votre bannière de cookies est également correctement installée sur votre site Web.
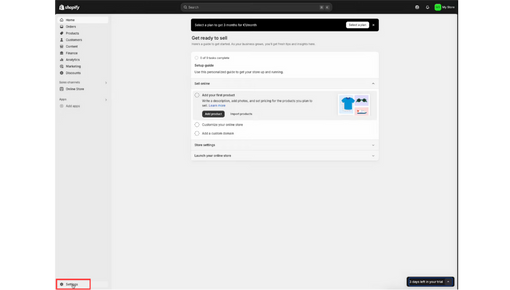
- Dans l'administration de votre boutique Shopify, cliquez sur »Réglages»
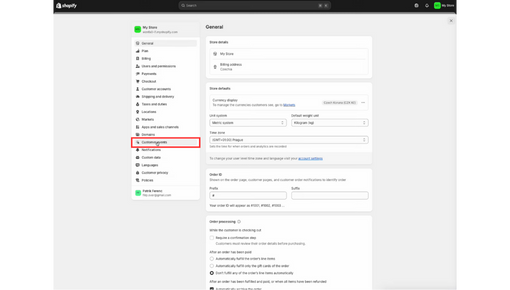
- Ensuite, allez à »Événements pour les clients»
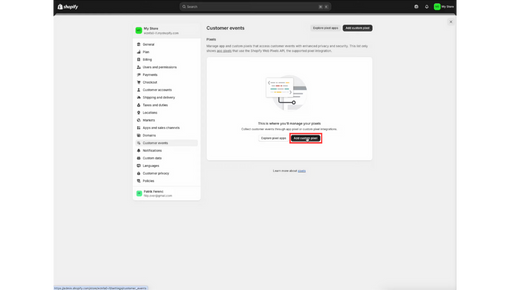
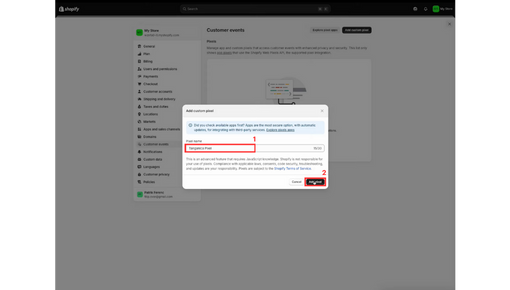
- 3. Cliquez sur »Ajouter un pixel personnalisé»
- Nommez votre pixel personnalisé « Pixel Tanganica », puis cliquez sur « Pixel Tanganica ».Ajouter un pixel»
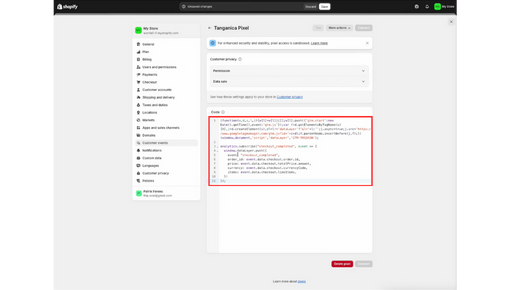
- Supprimez tous les commentaires gris dans la section du bloc de code
- Copiez le code suivant ci-dessous et collez-le dans le bloc de code de votre Shopify
(function(w,d,s,l,i){w[l]=w[l]||[];w[l].push({'gtm.start':new
Date().getTime(),event:'gtm.js'});var
f=d.getElementsByTagName(s)[0],j=d.createElement(s),dl=l!='dataLayer'?'&l='+l:'';j.async=true;j.src='https://www.googletagmanager.co
m/gtm.js?id='+i+dl;f.parentNode.insertBefore(j,f);})(window,document,'script','dataLayer','GTM-TRS5RSN');
analytics.subscribe("checkout_completed", event => {
window.dataLayer.push({
event: "checkout_completed",
order_id: event.data.checkout.order.id,
price: event.data.checkout.totalPrice.amount,
currency: event.data.checkout.currencyCode,
items: event.data.checkout.lineItems,
})
});
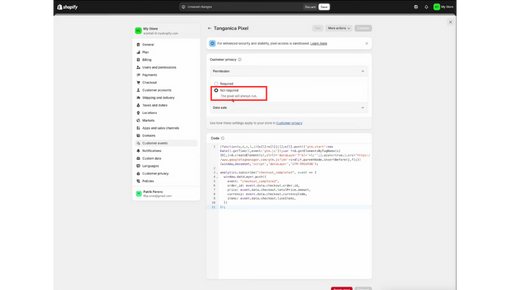
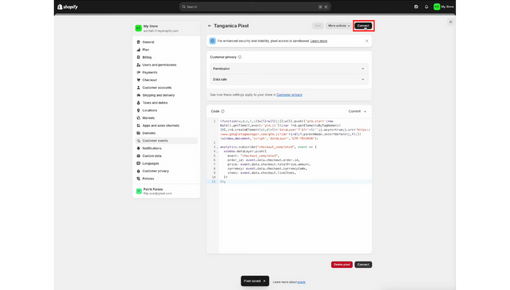
- Cliquez sur le »Bouton Enregistrer» en haut de la page
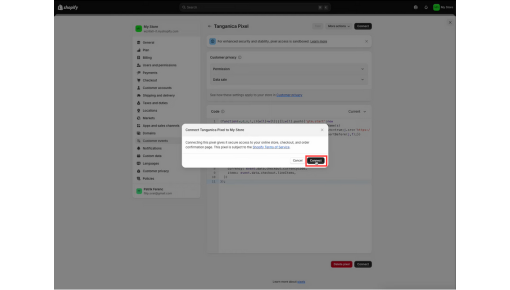
- Cliquez ensuite sur »Connecter»
Procédure selon les photos :

Votre Tanganica Pixel est maintenant correctement configuré. 👏
Si vous rencontrez des problèmes lors de l'installation du code, ne désespérez pas ! Ci-dessous ce lien vous trouverez un tutoriel détaillé pour vous aider à tout configurer correctement et à résoudre les éventuels problèmes.
